DIY ARYLIC FRAMES
Hey y’all!
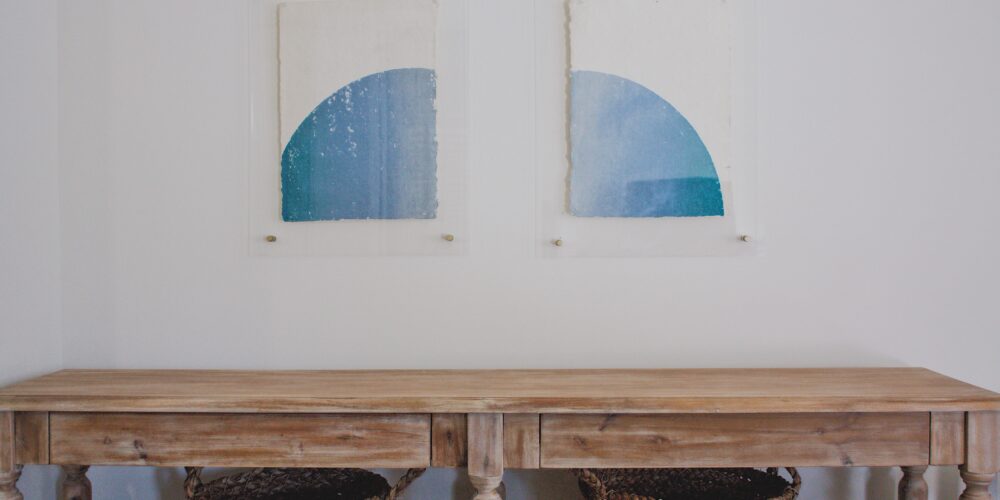
Today, I’m sharing with you one of my favorite DIY’s I’ve done this year! I found these beautiful one-of-a-kind handmade paper art prints at Blue Moon Trading Company over the summer. I wanted to keep the raw beauty of the handmade paper visible and I wanted a large scale art piece for the wall. There are various retailers that sell the Acrylic frames I want but they start at $80 and the ones that fit my art are $120/frame so it would costs upwards of $240 just for 2 frames! Framing is very expensive and I know that to get quality you pay quality and I am more than happy to invest when we are in our forever home. Right now, I am not putting art on the wall for longevity and let’s be honest, I’m also trying to ball on a budget here.
After shopping around and doing some research, here are the products that I purchased for this DIY:

Art (mine is old, but here are others) | Acrylic Sheets | Hardware | Double-Sided Mounting Tape | Drill
Supplies:
- Art: As I mentioned, my art is one-of-a-kind, but Blue Moon Trading Company in Tampa carries other handmade paper art prints. I get so much inspiration from walking into this small design boutique AND the owner is absolutely incredible. We have talked for hours about our love for design and her husband handcrafts all of the beautiful dining tables she carries.
- Acrylic Sheets: This is the best price for Acrylic Sheets! They are great quality and 2 for $24! At Home Depot they are around $11/sheet. When we cracked one of these sheets, we got one from Home Depot and the quality was sub-par. When you’re ballin’ on a budget, quality for the price is the name of the game.
- Hardware: These floating frame hardware pieces are silver, but they are much cheaper than buying the gold! The gold ones are $24 for 4 when these are $17 for 20! You can’t beat that! I spray painted mine gold in 2 hours and couldn’t tell the difference. This is the gold pray paint I use and it’s my favorite!
- Double-Sided Mounting Tape: You’ll need this to attached the art to the acrylic as we only used 1 sheet of acrylic per art. Because A. less expensive and B. a lesser chance of cracking the acrylic. You can only faintly see them if you shine a light directly behind the frame and they don’t bother me at all. I am also a big promoter of just stand far away and everything looks amazing.
- Drill: As many things as Alton and I do you would think we would have a drill. Well we didn’t until this project! We actually begged our friends to borrow their drill, because again, #savethatmoney. We borrowed this exact drill from them and loved it so much that we bought our own. I’m also 99% sure that you can rent one from any Lowes, Home Depot, or ACE Hardware for a certain $/day.

Here is a closer look at the hardware I painted. It looks great and when they are screwed in all the way you can’t tell they were painted!
Step 1:
If you purchased the silver hardware you’ll need to spray paint them all gold first. If you purchased the gold hardware then you’ll skip this first step. I used a piece of cardboard and nails to rest my hardware up-right so that I could spray paint them easily. Spray 2 coats of gold paint, let them dry, and you’re good to go.
Step 2:
Measure and mark where your hardware will go on the acrylic. We measured an 1 1/2″ from each corner to achieve a balanced look. The art measured 13″x15″ and the acrylic measured 18″x24″ and we went with our gut on this! I recommend measuring and marking all holes at one time, instead of measuring each time you make a cut. It will reduce the amount of thinking you have to do during the actual process. See my instagram saved highlight for a video tutorial.
Step 3:
This is the trickiest part and I may or may not have held my breath the entire time. This is where you drill your holes in your acrylic. We started by trying to drill the holes through both acrylic pieces at the same time. After cracking not 1, but 2 acrylic pieces, we decided that drilling one at a time was easier. I would recommend putting a piece of cardboard under the acrylic to prevent cracking. The trick is to not add to much pressure and to support the acrylic at all times with your non-drilling hand. See my instagram saved highlight for a video tutorial.
Step 4:
After you’ve drilled all the holes it’s time to add the hardware. From here, it doesn’t matter which order of the steps you choose to do. I wanted to make sure the hardware fit in the holes we drilled so I added the hardware first before I attached my art. You simple screw in each floating frame piece to each hole. Make sure to keep the plastic cover on the acrylic until you attach your artwork to decrease the chances of scratches.
Step 5:
The most satisfying part (in my opinion) adding your art! I originally imagined using “glue dots” but I didn’t know how they would show up on the art and the mounting tape would be stronger. I ended up cutting the mounting tape into tiny pieces and attaching it to each corner. This is where you want to peel the plastic off of the “back” of your piece of acrylic. You peel the other side of the adhesive off and stick on the “back” side of the acrylic so the “front” reads as a frame.

Step 6:
Step 6 is hanging your acrylic frames. I chose to use drywall anchor screws because I felt that to be the best option in my mind. I don’t see why you couldn’t just use finishing nails as their only job is to hold the hardware up and the frames are really not heavy at all. Finishing nails would probably be easier and less time consuming. All you need to do have to hang your frames is to have a piece of cardboard handy. Use one of the amazon boxes that your supplies came in! I used a pin to punch holes in the cardboard to create a template of the holes in the acrylic frame. Then you just take your “template” to the wall and mark where your holes need to go and wala! If you don’t have cardboard, you can always unscrew all of your hardware pieces and make a template that way, but that is super time consuming!


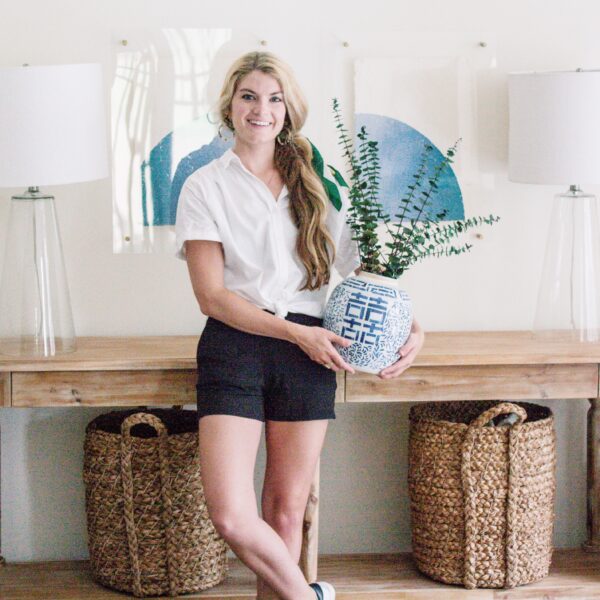
This is what the finished product looked like! I am so incredible happy with how it turned out. I hope that you enjoyed following along and check out my saved instagram highlight for a video tutorial. If you’d like to see more DIY tutorials please leave me a comment below and tell me what you’d like to see!
XO
Salem


